Configuring Outbound DKIM Signing
| Situation | You are unsure what DKIM signing is, how it works, and how to enable it. You want to use DKIM outbound signing to prevent spoofing of your domain. |
|---|---|
| Solution | See below for information on:
|
What Is DKIM Signing?
DomainKeys Identified Mail (DKIM) allows mail administrators to cryptographically sign outbound messages from their doimain, which proves that the message originated from the domain owner’s infrastructure and that the message was not materially altered in transit. Used in conjunction with DMARC, it provides a mechanism to prevent many types of spoofing of your domain.
Technically, DKIM is pretty straightforward. A keypair is generated with a private and public component. When sending a message through the gateway, the private key is used to add a message header which contains a cryptographic signature. Systems receiving DKIM-signed messages use the domain's public key, which they retrieve using DNS, to validate that the signature is valid and that the message hasn't been tampered with.
For more information on DKIM see our Configuring Inbound Anti-Spoofing Policies KB article
How Do I Enable Outbound DKIM Signing?
Each domain that sends email can be individually configured to sign outbound messages with DKIM. To enable the feature, you will need to create a new signing key, add the public key to your DNS zone, and verify that its been added correctly.
- Navigate to Administration > Account Management > Domains.
- Select the domain you want to configure and click the vertical ellipsis on the right-hand side of the Domains table.
- Click the option labeled Configure DKIM.
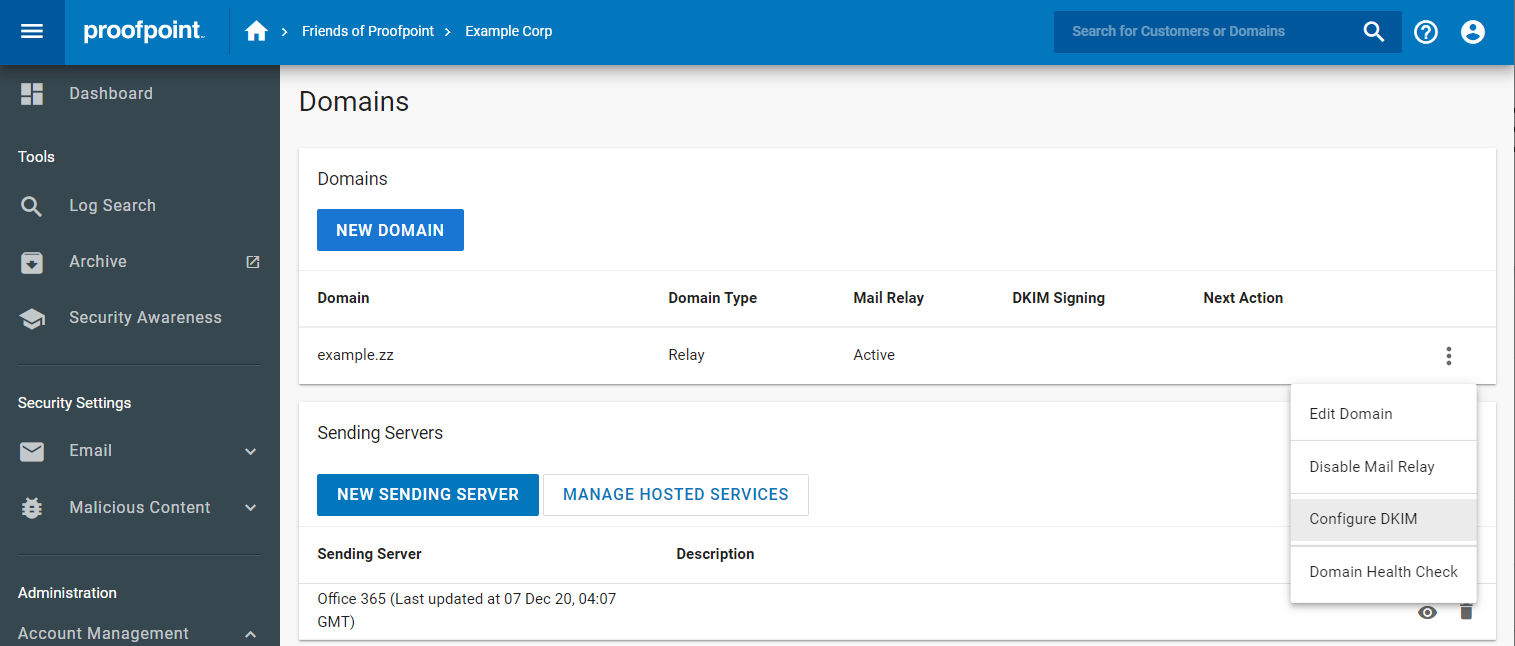
- A drawer will appear on the right side of the screen, listing all the currently configured DKIM keys. If this is your first time configuring DKIM, no keys will be listed. Click Create New DKIM Signing Key.
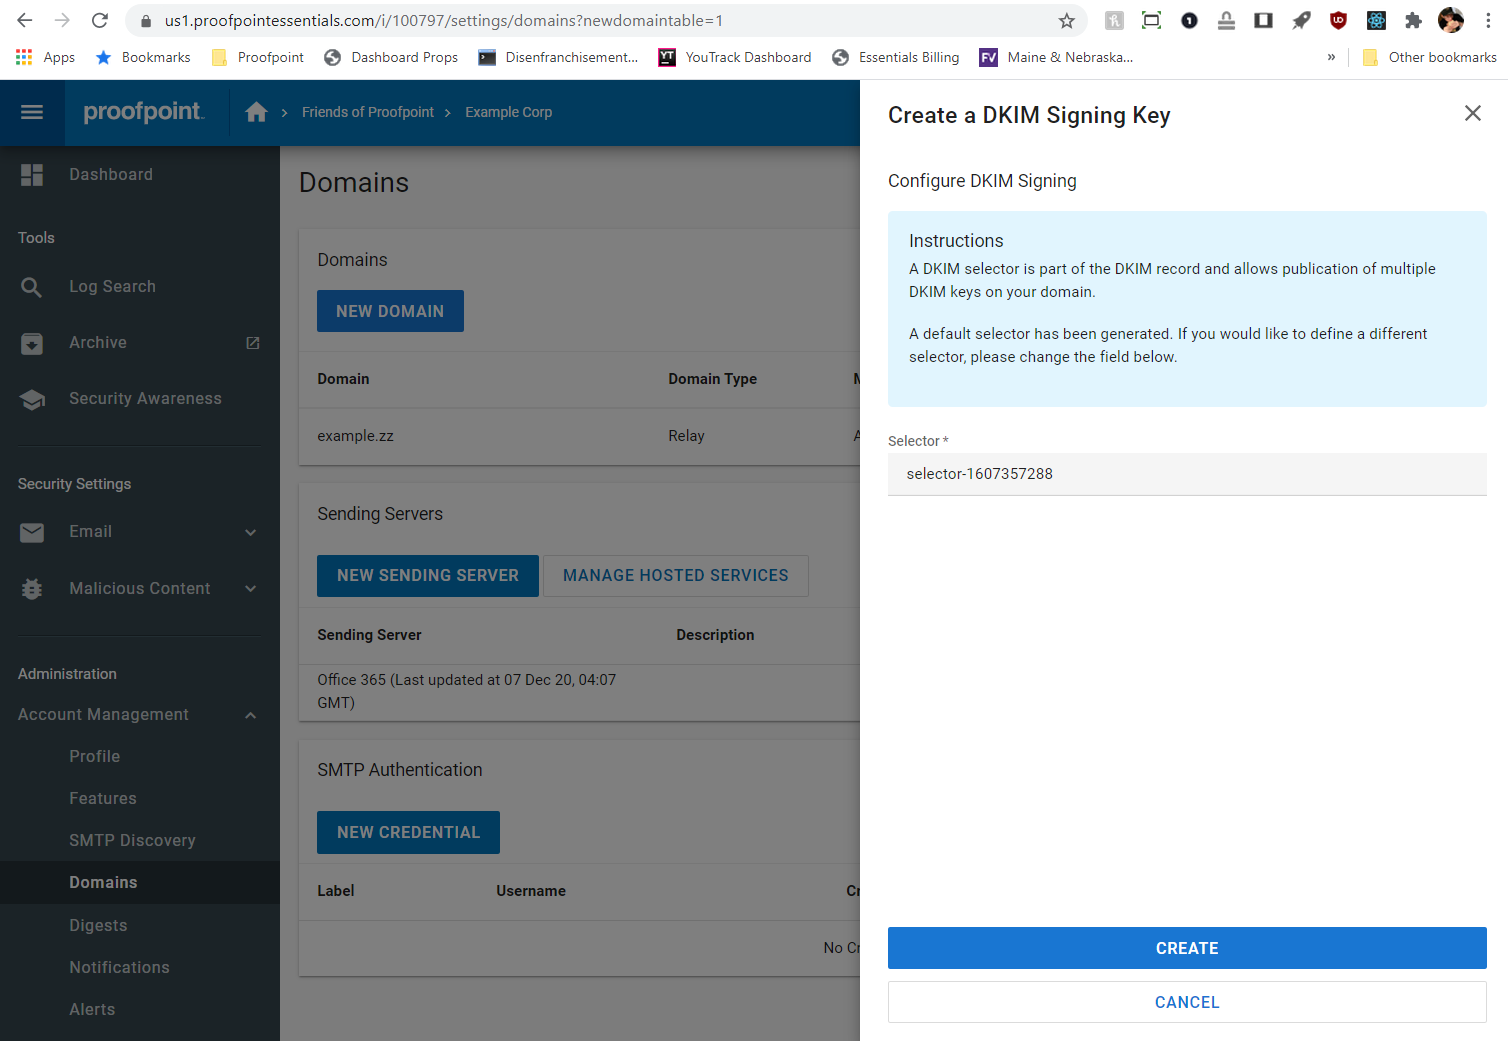
- The form will appear asking you to specify a selector. A selector is used to locate the public key in DNS and is not visible to end users. A value is pre-populated, but you can change it if you'd like. Click Create.
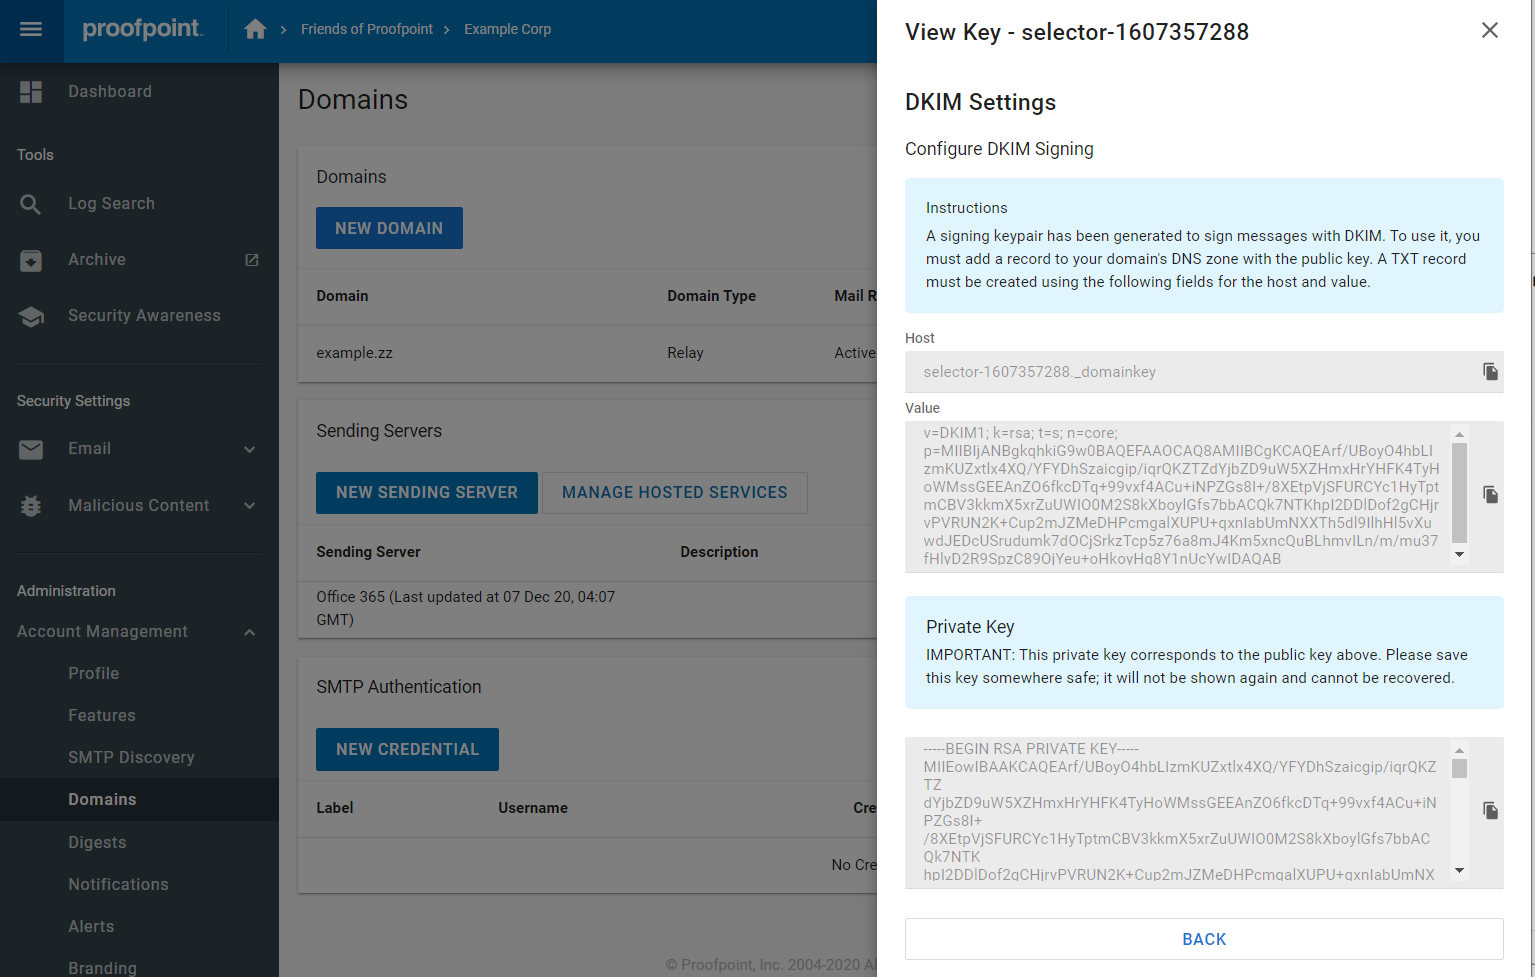
- The resulting screen will give you the hostname and value into your DNS zone. You typically do this on your domain registrar's website (GoDaddy, Dotster, Namecheap, etc.) cheese
You are also given an opportunity to save the private key to a secure location, in case you need it in the future. This is the only time this value will be displayed.
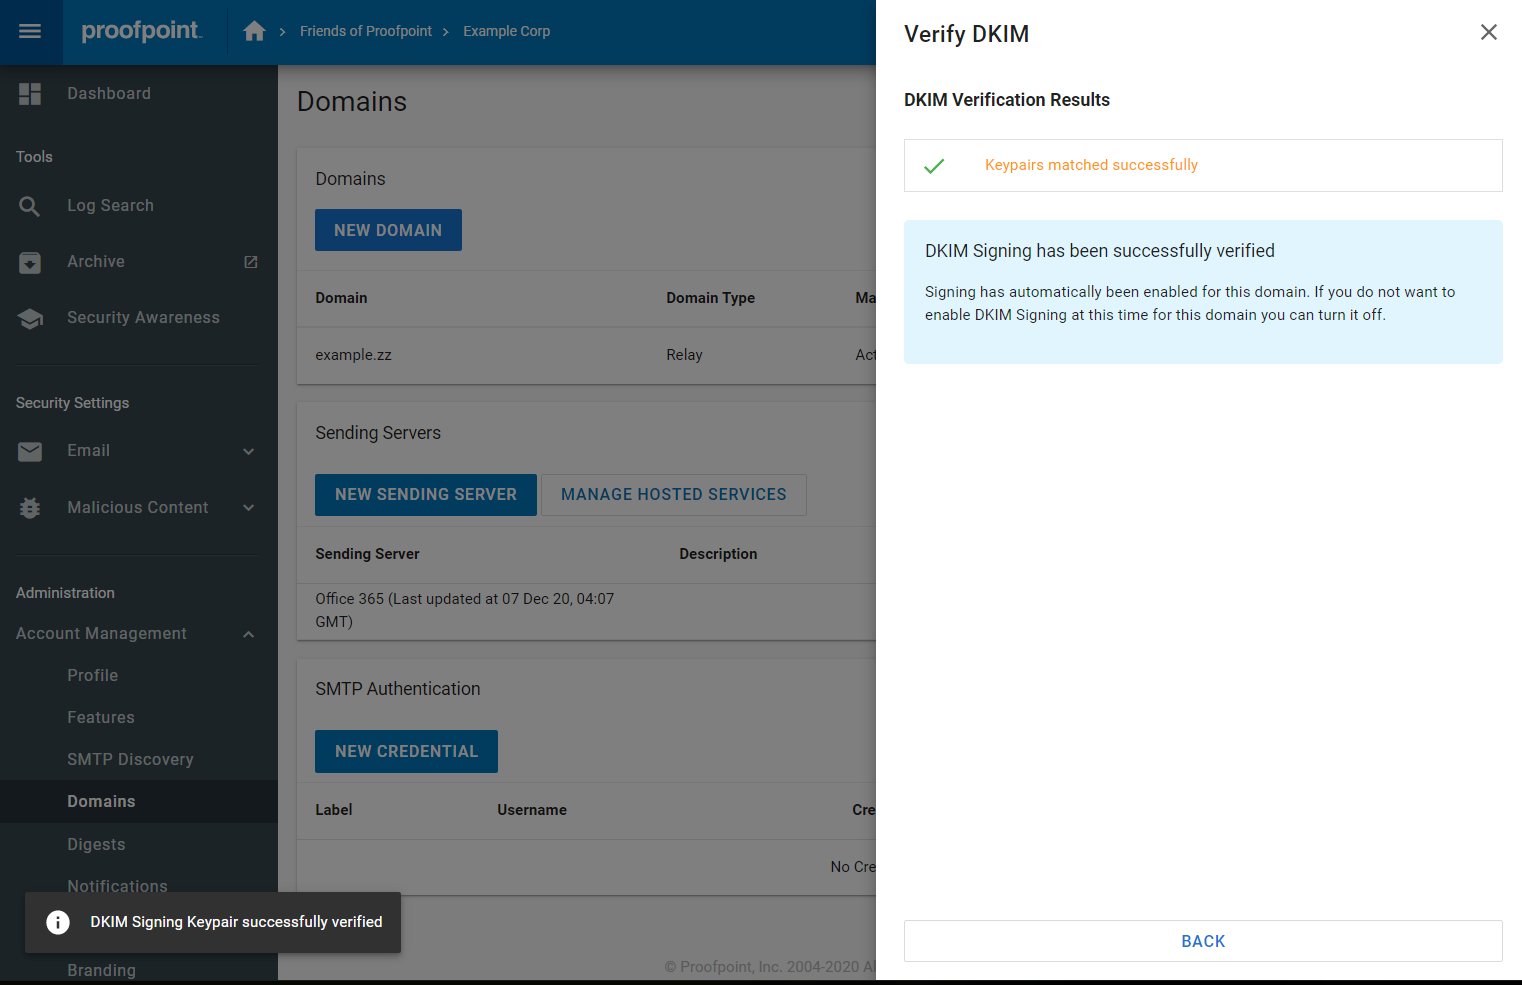
- Once you've made the addition to your DNS zone (and wait a good 5 minutes for propagation), Proofpoint Essentials will need to validate that the record was added correctly. To do so, click the Verify Key button in the key's context menu. Do not try to validate before updating the DNS, otherwise it could take a few hours for the cache to clear and be able to validate again.
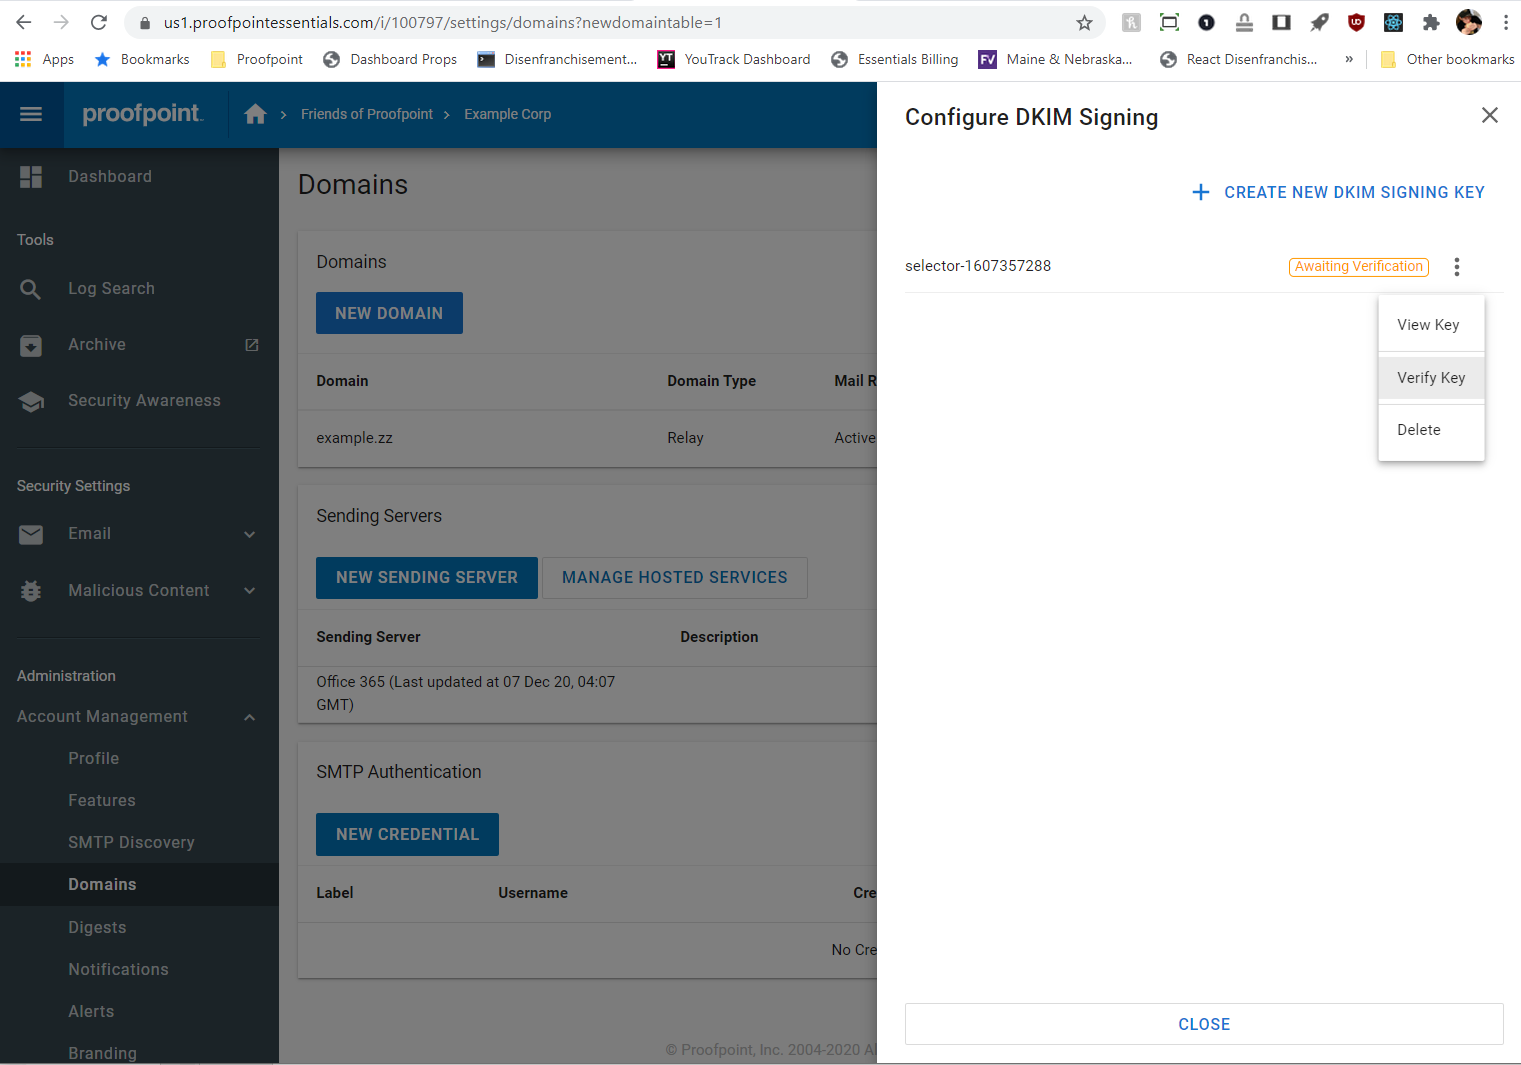
- Once the key is successfully verified, outbound DKIM signing is automatically enabled for this domain. You can disable signing at any time by using the vertical ellipsis on the right-hand side of the Domains table. Click the option labelled Disable DKIM.